Print version of this Book (PDF file)
Extract Window
The Extract window consists of the following four tabbed folders:
| • | Simulation Settings |
| • | Parameter Boundaries |
| • | Extract/Optimize |
| • | Options |
Simulation Settings
The simulator to be used (Tnom for extraction), Main Circuit, and corresponding Model Parameters are all set in this folder. The value of Tnom is automatically copied to the parameters that contain TNOM in the name.
Figure 190 Simulation Settings folder of Extract window
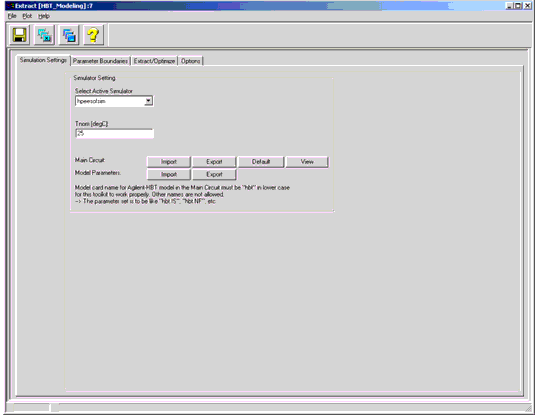
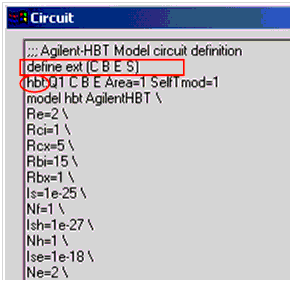
The number of external nodes must be 4 and only C, B, E, and S are allowed for their node names. S node is not connected to the Agilent-HBT model in the default setup since the model is a 3-node model. The S node is provided in the toolkit just for generalization purposes.
Note
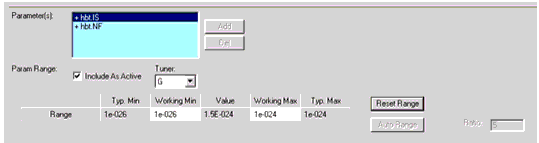
Parameter Boundaries
Parameter boundaries (Opt Min and Opt Max) set in this folder are used as default ranging Typ. Min/Max values in the Function Editor (see Function Editor).
Figure 192 Parameter Boundaries folder of Extract window

Figure 193 Parameter ranging in the Function Editor
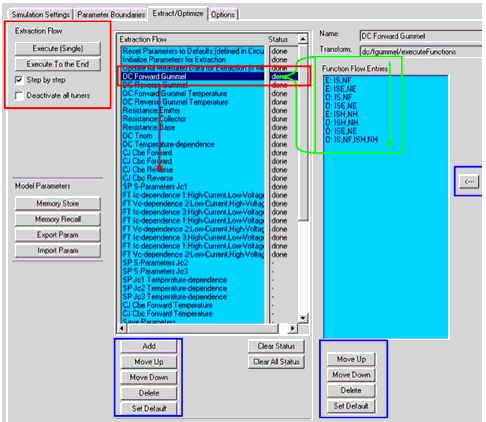
Extract/Optimize
Extraction and tuning/optimization are done in this folder.
The left list represents Extraction Flow and by selecting one of these items, you will see functions belonging to the selected flow item in the 2nd list (Function Flow Entries) and the 3rd list (Available Function List).
Figure 194 Extract/Optimize folder of Extract window
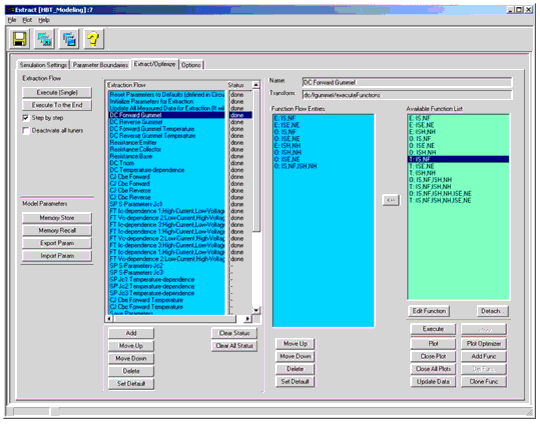
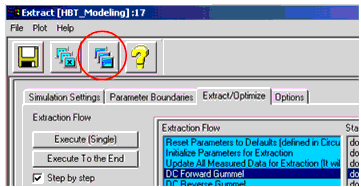
Flow Execution (Group execution of functions)
Execute (Single) button executes a single flow item in which some functions are grouped and listed for execution. You can edit the function entry list with <--- button, Delete button, and Move Up/Down buttons.
Execute To the End button executes from the selected flow item to the end of the flow list. If the Step by step check box is checked, the execution will pause at each end of the flow item execution with a prompting dialog box. If Deactivate all tuners is checked, all tuning functions will be skipped during the flow execution.
Figure 195 Execution from Extraction Flow
Memory Store, Memory Recall, Export Param, and Import Param buttons are used for parameter set management during the extraction setup.

The flow item of Update All Measured Data for Extraction is necessary to be executed at least once before actual extraction procedures. Executing this ensures that all measured data sets are calculated (using de-embedded S-parameters for RF) and updated. This will take several minutes or so.
Note
DO NOT stop execution of Update All Measured Data for Extraction by pressing the RED stop sign button on the IC-CAP/Status window. Interrupting the process of updating variables and variable arrays inside the mdl file will destroy the variable structures, and in this case, you may have to reload the toolkit without saving.
Caution
Function Execution (Individual function execution)
Execute button below the Available Function List on the right of the folder executes the selected function in the list.
Figure 196 Execution from Available Function List
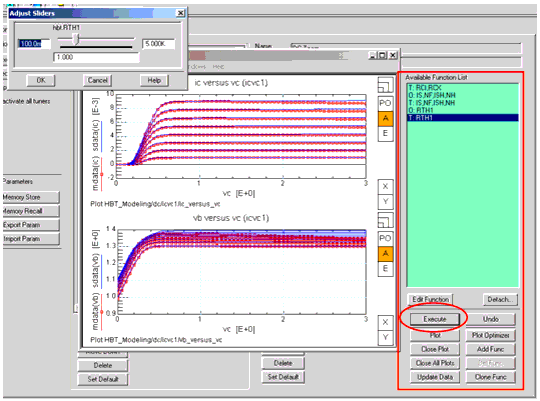
E: in the function name stands for (initial) extraction, T: for tuning, and O: for optimization. PT: and PO: are for Plot-Optimizer-based functions.
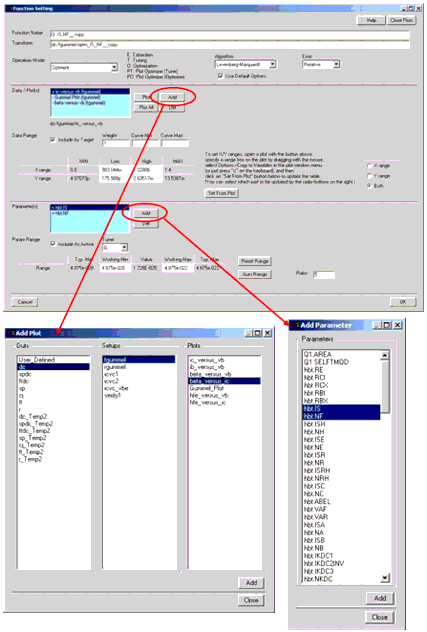
Function Editor
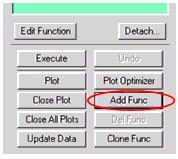
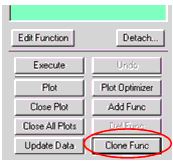
You can configure existing functions with the Function Editor window, which is opened by clicking on the Edit Function button on the right of the folder. Also, you can add new user-defined functions by clicking on the Add Func button. Click on the Clone Func button to copy existing and create a new function. The Function Editor is powerful and useful for creating your own extraction routines.

Using the Function Editor window you can assign target data sets and parameters to be extracted/optimized. You can also specify the range for each data set and each parameter.
Figure 197 Function Editor window
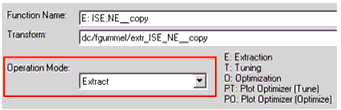
Pre-defined functions cannot be deleted and are not fully editable (some GUI components are greyed out to protect the functions). If you would like to configure the pre-defined functions, Clone the function using a different function name, so that the new function becomes fully configurable.
Note
Figure 198 Defining Target Data/Plot(s)
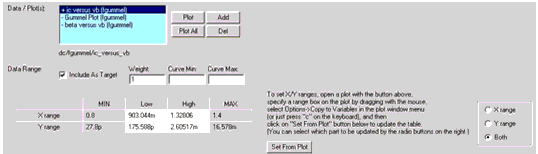
If Include As Target check box is unchecked, the data will be excluded from the extraction/optimization. (The name of the data in the list starts with '-')
How to Set Data Ranges
To set data ranges using a plot, do the following:
| 1 | Show the plot by clicking the Plot button in the Function Editor. |
| 2 | Specify a ranging box in the plot by dragging with your mouse. |
| 3 | Select Options > Copy to Variables from the plot window menu (or just press c on your keyboard). |
| 4 | Select mode. |
| 5 | Click on the Set From Plot button to copy the ranging values to the Data Range table. |
Figure 199 How to set Data Ranges from Plot
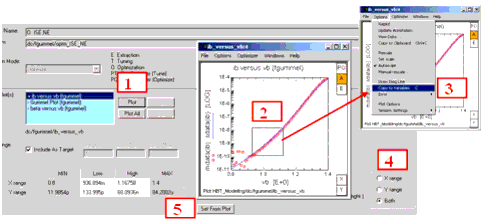
Figure 200 Defining Parameter(s) to be extracted/optimized
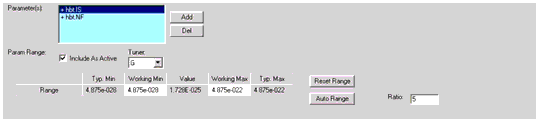
If the Include As Active check box is unchecked, the parameter will be excluded from the extraction/optimization. (The name of the parameter in the list starts with '-'.)
The following shows how to add target data/plot(s) and parameter(s). You can select multiple items in each selecting dialog box.
Figure 201 How to add target data/plot(s) and parameter(s)
When the Add Func button has been clicked, the top area of the Function Editor window will be like below.
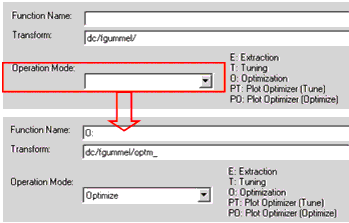
Select Operation Mode first, which fills the Function Name field and Transform field as shown above.
Note
The naming rule is as follows:
 [Operation Mode] / [Function Name header] / [Transform name
header]
 Extract / "E:" / "extr_"
 Tune / "T:" / "optm_"
 Optimize / "O:" / "optm_"
 Plot Optimizer (Tune) / "PT:" / "po_optm_"
 Plot Optimizer (Optimize) / "PO:" / "po_optm_"
To avoid needless confusion you should follow the naming rule for the Function name and Transform name.
For the Transform name, only alphabetic characters, numbers providing they are not the first character, and "_" (under bar) are allowed. DO NOT use any other characters.
Note
When the Clone Func button has been clicked, the top area of the Function Editor window will be like below.
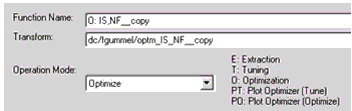
The cloned function of a pre-defined function is fully configurable.
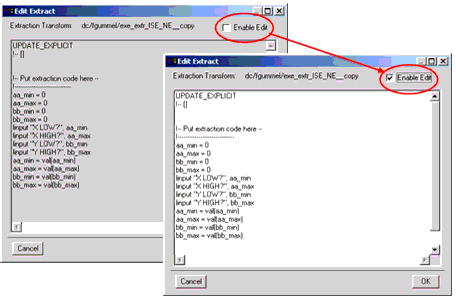
Extraction Code Editor
If Operation Mode is E: (Extraction), after you close the Function Editor by clicking OK, the window below will be shown (Extraction Code Editor) where actual user-defined extraction code can be written. To write code, you must have knowledge of the IC-CAP extraction language (PEL). This is an advanced use of the toolkit. The OK button applies the change you made to the actual transform code. The Cancel button does nothing to the existing transform.
Figure 202 Extraction Code Editor
Plots Display (Extraction result browser)
To display extraction results, click on the third button from the left in the Extract window's toolbar.
Figure 203 Button to open Extraction Result Browser
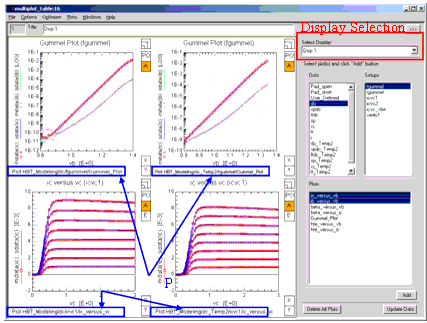
The plot display window appears as shown in the following figure (Extraction Result Browser). Using the control panel on the right of the window, you can categorize the plots into separate folders based on results.
Figure 204 Extraction Result Browser
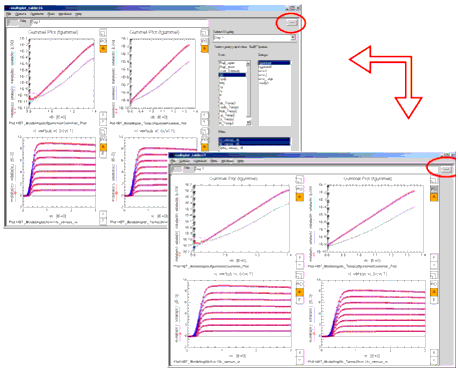
Click the button shown in the following figure to show or hide the control panel.
Figure 205 Show/Hide of Control Panel
Options for Extractions
Figure 206 Options folder of Extract window
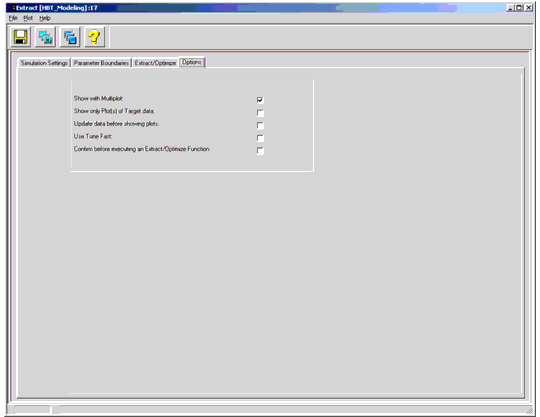
If Show with Multiplot is checked, plots will be displayed in a Multiplot window. Otherwise the plots will be opened in separate windows.
If Show only Plot(s) of Target data is checked, only plots with data included as Target Data in the Function Editor will be shown.
If Update data before showing plots is checked, the data is updated before plots are displayed. Otherwise, plots are shown quickly without updating the data.
If Use Tune Fast is checked, Tune functions are executed in Fast mode.
If Confirm before executing an Extract/Optimize Function is checked, you will be prompted with a dialog box before executing each function.