Print version of this Book (PDF file)
More on Tables (Examples)
To keep the tabs less cluttered IC-CAP, by default, does not display the GUI Items tab.
To make the tab visible, from the ICCAP/Main Window, choose the menu pick Tools > Options > View GUI Pages. Then when you open a new model (or close and reopen the Model window of a previously loaded model) you will see a GUI Items page at the Model level, DUT level, and Setup level.
Captions, Frames and Sizing
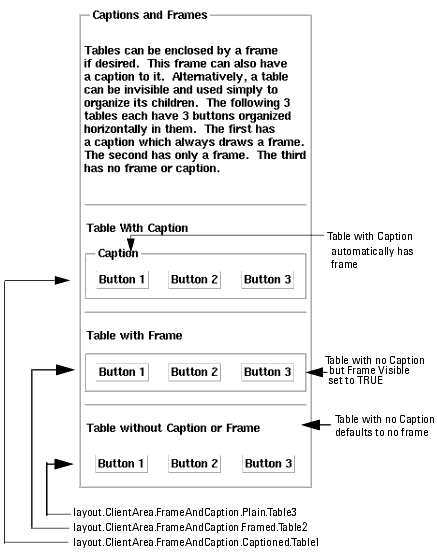
The following examples are taken from the Wizard. You can follow them both with this manual or by showing them through IC-CAP.
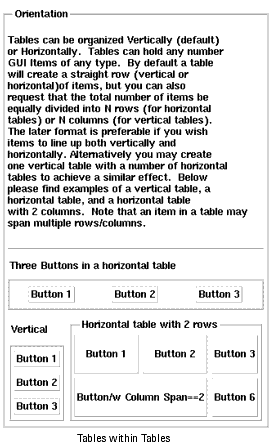
In the following figure, the path to each of the three tables that control the style are shown at the bottom.
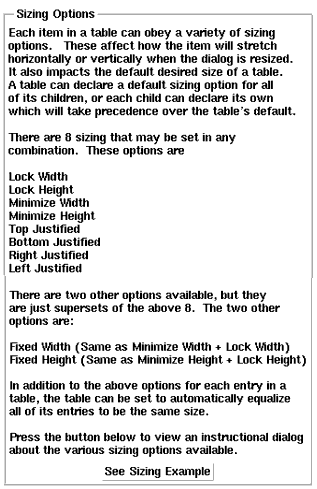
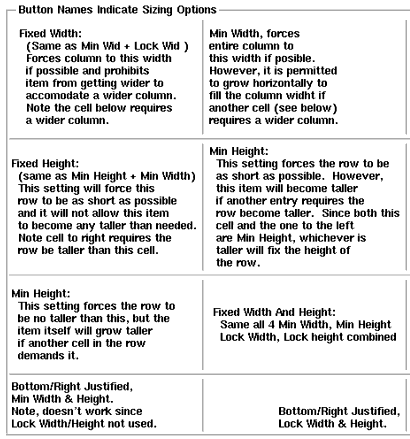
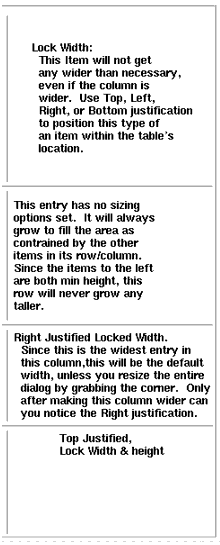
In the examples below display the following window, and then stretch it vertically and horizontally to really see the affect of the options.
Rows and Columns within Tables
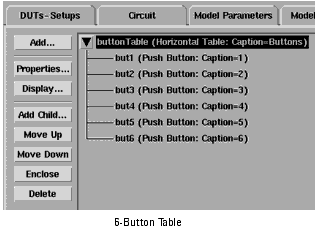
The figure below shows the tree for six Push Buttons added to a Table.
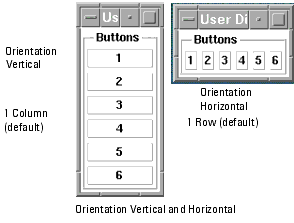
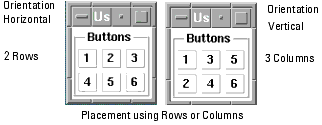
The resultant set of buttons can take many forms. In the figure below the Option Number Rows/Columns is at the default value of 1. The left set of buttons has the default Orientation of Vertical, the right is Horizontal.
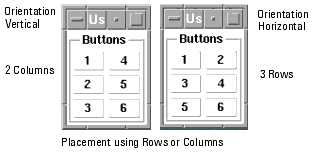
There is no limit to the number of items in a row or column unless it is set with the Number Rows/Columns option set to a value greater than one as shown below. The six buttons are divided between two columns (left) and three rows (right).
Yet another ordering is shown below.
The use of multiple rows or columns is simple and flexible. It works best with items which are all the same. The problems are when items are added or removed as the GUI is developed causing the number of items to be no longer exactly divisible by the number of rows or columns.
Enclose
The hierarchy of tables nested within tables controls the relative placements of all the widgets in a GUI. If we need to add more widgets in new places not permitted by the current hierarchy of place holders then we need to insert a new level into the overall hierarchy. This is what the Enclose command does.
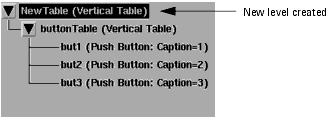
For example we have a vertical table called buttonTable which contains three Push Buttons in a vertical column.
We wish to add three sliders but a six-high column of items would be too tall to fit within the GUI layout. What we want is to place the three new items in a vertical column to the right of the existing column, but there is no place-holder for them.
On the Model GUI Page tab select buttonTable and click on Enclose.
You will see that a new table with the default name Newtable has been inserted into the hierarchy as a new level, and that buttonTable is nested in it. (At this point the displays of Newtable and buttonTable are identical.)
Newtable has the default orientation of Vertical so we select it and click Properties so we can change the orientation to Horizontal.
Back in the Model GUI Items we now select Newtable and click on Add Child....
In the Widget Properties dialog select Table and name it, for example sliderTable.
Back in the Model GUI Items select sliderTable and click on Add Child...
In the Widget Properties dialog select Slider.
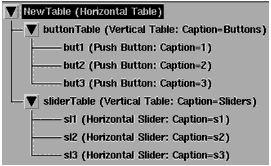
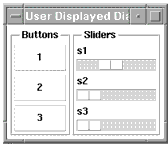
Repeat this step two more times and we now have two 3-high columns, one of Push Buttons and the other of Sliders, as shown below.
The Enclose command gave you two advantages.
| • | You can change your mind during the development of the GUI and add a new level of hierarchy. |
| • | The buttons and sliders are now in separate Tables. If you change the number in either table there will be no overflow from one to the other as would happen with a single table split into rows and columns. |
