Installing IC-CAP
IC-CAP can be installed on a UNIX system using either the IC-CAP installation CD or by downloading IC-CAP installation images from the Agilent EEsof Knowledge Center website:
- http://www.agilent.com/find/eesof-knowledgecenter
Use the following information for installing IC-CAP on a UNIX system. For last-minute program and documentation information, refer to the Release Notes document on our website at:
- http://www.agilent.com/find/eesof-docs/
Choose IC-CAP 2008 > Release Notes.
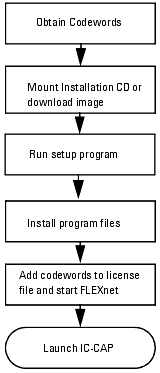
Installation Steps
Use the following steps for installing IC-CAP on UNIX systems. If you have not done so, please review Before You Begin. Also, if you installed a pre-release Beta version of IC-CAP, you should uninstall it before loading this release.
|
Note
|
|
|
|
|
The installation program does not support cross-platform installations. Please be sure to use the correct platform-specific installation image for your system.
|
|
To install IC-CAP on UNIX systems:
| 1 |
Log onto the system using an account that has permissions to write to the disk to which you want to install. |
| 2 |
If you are installing from a CD-ROM, mount the IC-CAP CD-ROM. Mounting a CD-ROM file system on a UNIX system requires root or super-user privileges on most systems. |
- The typical mount point, or directory, for a CD-ROM is /cdrom. This may be different on your system. The mount point directory must exist before you can mount the CD-ROM. To create a /cdrom directory, type:
-
mkdir /cdrom
- To mount the Program CD-ROM, run the command for your system:
-
mount -rt hsfs /dev/sr0 /cdrom (SunOS 5.x)
mount -t iso9660 /dev/cdrom /cdrom (Linux)
- Once the Program CD-ROM is mounted, exit from being root before completing the rest of the installation procedure if you do not want to install as root.
| 3 |
If you are installing from a downloaded image, download then untar the appropriate IC-CAP installation image for your platform from the Agilent EEsof Knowledge Center website: |
- http://www.agilent.com/find/eesof-knowledgecenter
- For example to untar the file on Linux:
- tar xf iccap640rday_linux_x86.tar
| 4 |
Change directory to the Program CD-ROM or to the path of the extracted tar files. |
- cd /cdrom
| 5 |
To start the installation program type:
./SETUP.SH |
|
Note
|
|
|
|
|
If you do not have a fully compliant X display available, you can run the installation in console mode. To start the program in console mode, add the -console argument to the SETUP command. For example, type:
./SETUP.SH -console
|
|
|
Note
|
|
|
|
|
The Sun File Manager is not recommended to invoke SETUP. If you use the file manager to invoke SETUP, a new terminal window is created. If you select Q to quit the installation, the terminal window remains open until you close it by pressing Ctrl-C.
|
|
|
Note
|
|
|
|
|
If you are running Netscape, or another program that uses a lot of color resources, you should shut it down before starting the installation.
|
|
| 6 |
At the Welcome screen, choose: |
| |
• |
Next to read the License Agreement. This is a usage agreement and is not related to the license codewords required to run the software. You must accept the agreement to continue with the installation. This appears only when you run Setup the first time or after uninstalling IC-CAP. |
| 7 |
At the License Agreement screen, after reviewing the agreement, choose either: |
| |
• |
I accept the terms of the license agreement |
| |
• |
I do not accept the terms of the license agreement |
- then click Next to continue with the setup or Cancel to end the setup program.
| 8 |
At the Installation Directory screen, choose: |
| |
• |
Next to install to the default destination. |
| |
• |
Browse to specify a different destination folder. If you specify a folder that does not exist, the installation program will ask if you want to create it. |
| 9 |
At the Summary Information screen, review your choices then choose: |
| |
• |
Back to access previous screens to verify entries and make changes. This screen appears again if you go back to make other choices. |
| |
• |
Install to begin the installation. |
| |
• |
Cancel to exit the Setup without completing the installation. |
- After you click Install, the program starts copying files. The status screen displays the files being installed and shows the installation progress.
| 10 |
After reading the information about how to obtain licenses or codewords to run IC-CAP, click Finish. |
| 11 |
If you installed from a CD-ROM, unmount the installation CD-ROM: |
-
cd /
umount /cdrom
|
Note
|
|
|
|
|
You will need to be in the root directory to unmount the CD-ROM. If you are running Solaris and vold is active, you can type the following command to unmount the CD-ROM: eject cdrom.
|
|
| 12 |
Use the FLEXnet security codewords from Agilent EEsof to create a license.lic file with the correct SERVER and VENDOR line configurations. |
Installing from a File Server
The contents of the IC-CAP CD or downloaded and untarred installation image can be copied to a file server enabling you to install IC-CAP from this file server. This arrangement is useful for doing silent installations (see Silent Installations). The following steps explain how to set up the file server and run the installation.
| 1 |
If installing from a CD, insert the IC-CAP installation CD into the file server's CD-ROM drive and mount the Program CD-ROM by running the command for your system: |
-
mount -rt hsfs /dev/sr0 /cdrom (SunOS 5.x)
mount -t iso9660 /dev/cdrom /cdrom (Linux)
| 2 |
Either copy the contents of the CD into a folder or untar the downloaded installation image into a folder. |
-
cd /mnt/cdrom
-
cp -r * /local/ICCAP2008_image
| 3 |
To start the installation program type: |
-
./SETUP.SH
- You may run the normal installation described in Installation Steps, or the silent installation described in Silent Installations.
Silent Installations
The InstallShield program provided with IC-CAP supports a silent installation. A normal (non-silent) installation receives the necessary input from the person installing the software in the form of responses to prompts in dialog boxes. However, a silent installation does not display prompts for inputs. Instead, a silent installation gets inputs from a response file.
Silent Installation Overview
To set up and run a silent installation on a UNIX system for IC-CAP 2008:
| 1 |
On a server, copy the contents of the IC-CAP installation image (from CD or downloaded and untarred) to a folder. Details about setting up a file server are described in Installing from a File Server. |
| 2 |
On clients, run the SETUP using arguments for a silent installation, including the path and file name of the response file. |
| 3 |
If needed, run a silent uninstallation to remove IC-CAP from client machines. |
Response File Contents
The response file provides the inputs automatically during silent installations. The command to execute a silent installation includes the path and file name of the response file. Using our example location for the installation contents, the sample response.txt file is located in the local/ICCAP2008_image/silent folder.
The response.txt file supplies the following inputs requested by the installation program:
| • |
Installs IC-CAP 2008 into the current folder. |
| • |
Sets the home folder to the current folder. |
If you want to change these settings, copy and edit the response.txt file being careful to change only the settings in question to avoid corrupting the file. To change the installation folder, change -P installLocation and -V IS_DESTINATION to a new path.
Running a Silent Installation
To run a silent installation:
| 1 |
Verify that IC-CAP 2008 has not already been installed. There should not be a iccap2008 folder since the silent installation process is not expecting it to be there. If IC-CAP has been installed, uninstall it. |
| 2 |
Change to the /local/ICCAP2008_image folder. |
| 3 |
To start the installation program type ./SETUP.SH followed by the full path for the response file and the silent installation option. For example: |
-
cd /local/ICCAP2008_image
./SETUP.SH -options "tmp/response.txt" -silent
| 4 |
After waiting 3 to 5 minutes for the installation process to finish, verify that the installation process is done by checking that the _uninst directory is located under the installation directory. |
Running a Silent Uninstallation
When you need to run a silent uninstallation, use the sample response file, uninst_response.txt. Using our example location for the installation contents, the uninst_response.txt file is located in the /local/ICCAP2008_image/silent folder.
To run a silent uninstallation:
| 1 |
Change to the folder containing the uninst_response.txt file. |
-
cd /local/ICCAP2008_image/silent
| 2 |
Copy the uninst_response.txt file to the folder tmp: |
-
cp uninst_response.txt /tmp
| 3 |
Change to the _uninst subfolder in the IC-CAP installation folder: |
-
cd local/iccap2008/_uninst
-
./uninstaller.bin -options "tmp/uninst_response.txt" -silent
This process opens a progress dialog box. When the dialog box closes, the process is done.
Troubleshooting
The most effective way to troubleshoot errors with the silent install/uninstall process is to run the same type of installation in normal or visual mode.
Configuring User Accounts
Configure the user accounts that will run IC-CAP as follows:
C-Shell:
Add the following at the end of $HOME/.cshrc:
-
setenv ICCAP_ROOT <install_directory>
setenv AGILEESOFD_LICENSE_FILE <path_to_license_file>
- Default: $ICCAP_ROOT/licenses/license.lic
-
set path = ( . $ICCAP_ROOT/bin $path )
Bourne or Korn Shell:
Add the following at the end of $HOME/.profile:
-
ICCAP_ROOT=<install_directory>
AGILEESOFD_LICENSE_FILE=<path_to_license_file>
- Default: $ICCAP_ROOT/licenses/license.lic
-
PATH=.:$ICCAP_ROOT/bin:$PATH
export ICCAP_ROOT AGILEESOFD_LICENSE_FILE PATH
|
Note
|
|
|
|
|
If you are running Common Desktop Environment (CDE), your user account may be using $HOME/.dtprofile to set up your user account instead of .cshrc or .profile. The .dtprofile files contain a line that can be uncommented to activate the use of .cshrc or .profile. Please see your system administrator or CDE documentation for details.
|
|
Once the user accounts are configured, each user should log in and verify that the new environment variables are set. Type the env command and check that ICCAP_ROOT and AGILEESOFD_LICENSE_FILE are set and that PATH contains a path to the IC-CAP bin subdirectory.
If you installed IC-CAP as root, the ownership of directories and files will be set to user id 1313 and group id 22. To change this, enter:
-
cd $ICCAP_ROOT
chown -R root *
chgrp -R sys *
Setting the Display
If you plan to run IC-CAP from a remote computer and you want the display to appear on your local machine, you will need to set the DISPLAY environment variable:
-
setenv DISPLAY <my_hostname>: 0.0 (C-Shell)
DISPLAY = <my_hostname>: 0.0 (Korn Shell, Bourne Shell)
export DISPLAY
For details on using the Sun Ray appliance, refer to the Sun website at: http://www.sun.com/sunray/index.html
|