Replacing a Sony TV Power Supply
2021-07-04
Last week, someone threw out a Sony TV (KDL-46V4100) that looked in pretty good condition. Externally, there was no visible damage and it was even relatively clean. So I decided to bring it home and see what was wrong. Who knows, maybe someone threw out a working TV?
The TV didn't work - I know, it was a long-shot. Even the standby light didn't turn on and there were no sounds from the relays, so I guessed it was a power supply issue. Since it was garbage anyway, I wanted to see what's inside.
The first thing we tried of course, was replacing the fuse but got no results. My assistant and I poked it for a bit with the volt meter but couldn't see any DC voltage coming out of the power supply. By then it was the end of the weekend so we put the TV aside for a while.
A few days later, I saw another TV thrown away in the same location! It was the same brand and series as the first (Sony Bravia) and even the same manufacture year (2009) but it was much larger (55" KDL-55V5100). The second one had a completely destroyed LCD so it was clear why it was thrown away, but I guessed the control board and power supply may still be in working condition.
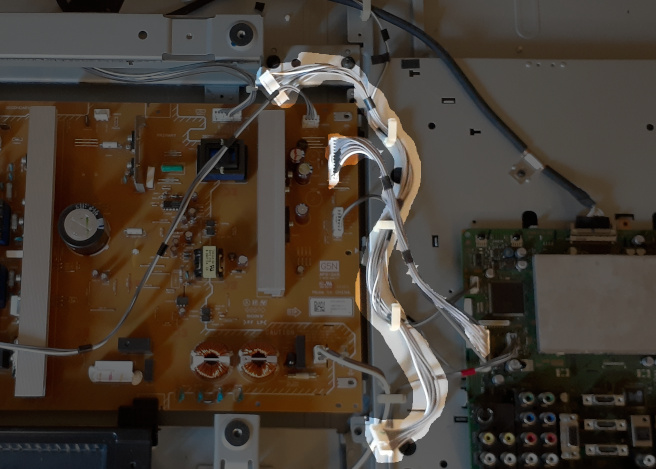
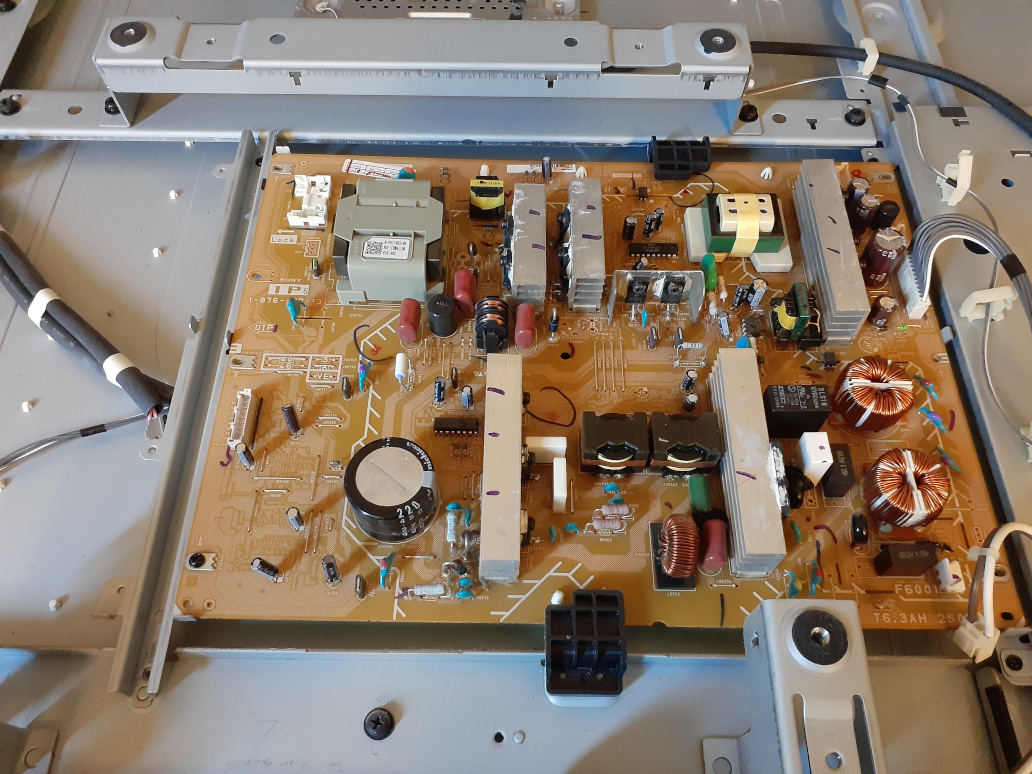
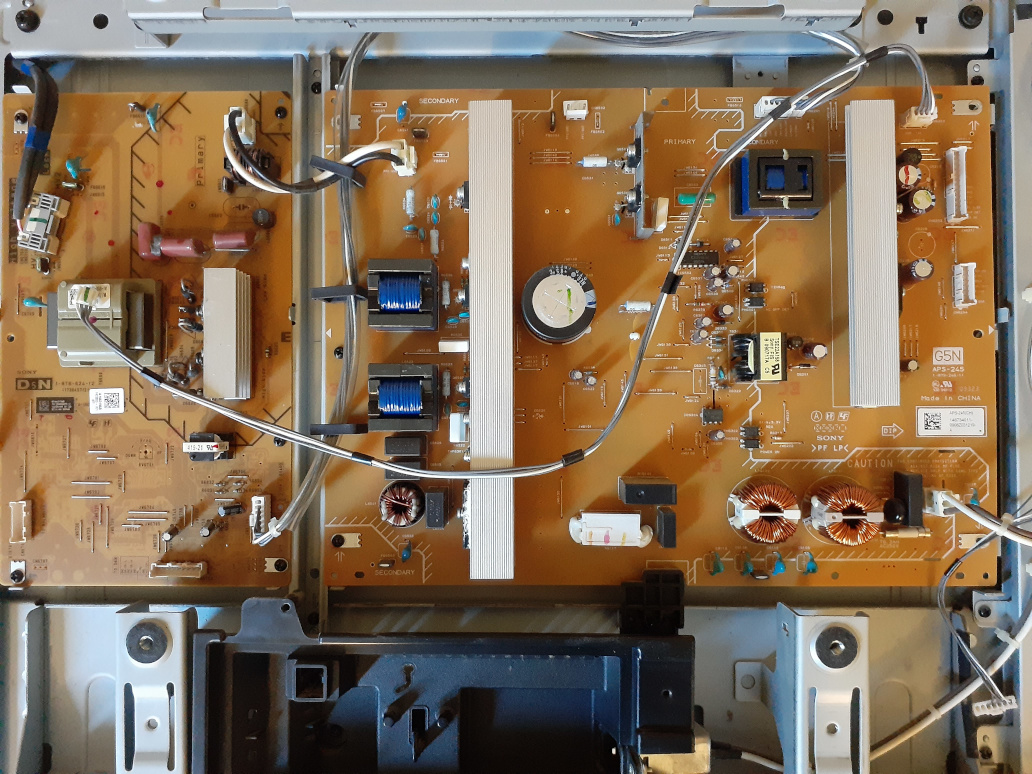
I ripped it apart and pulled out all of the power supply boards (yellow) and control board (green). I didn't take the high voltage LCD drivers (there are one on each side) or the LCD controller (under the steel plate in the middle-top). I figured since the TV's were all but identical, it should be an easy swap.
I was almost right.
Mechanical
The larger KDL-55V5100 has two backlight drivers, which means it has one power supply board more than the smaller KDL-46V4100. For completeness, these boards are labeled D5N (left driver) and D6N (right driver). I was able to discard the D6N and use the rest of the power supply (D5N and G5N) without any problems. That is important since there is no good place to mount another board inside the smaller chassis. The remaining power supply boards are physically larger than the single one in the original, but thanks to Sony engineering, the chassis is nearly identical and was able to comfortably fit two boards in place of one. I had to use the original rail since the rail from the KDL-55V5100 was too narrow and none of the screw holes lined up on either side. All the screws fit on the smaller board and the rail, but didn't quite line up with the main board unfortunately. It looks like a difference of 2 or 3 millimeters. Also, the plastic bracket meant to secure the main board at the top could not be installed because it conflicts with a cable connecting the two boards. In the end, the main board is supported on the left by the rail and on the bottom by the plastic bracket. Not as secure as I would have liked, but there isn't much room for the board to move (and I'm not in the habit of shaking my TV violently anyway).

Electrical
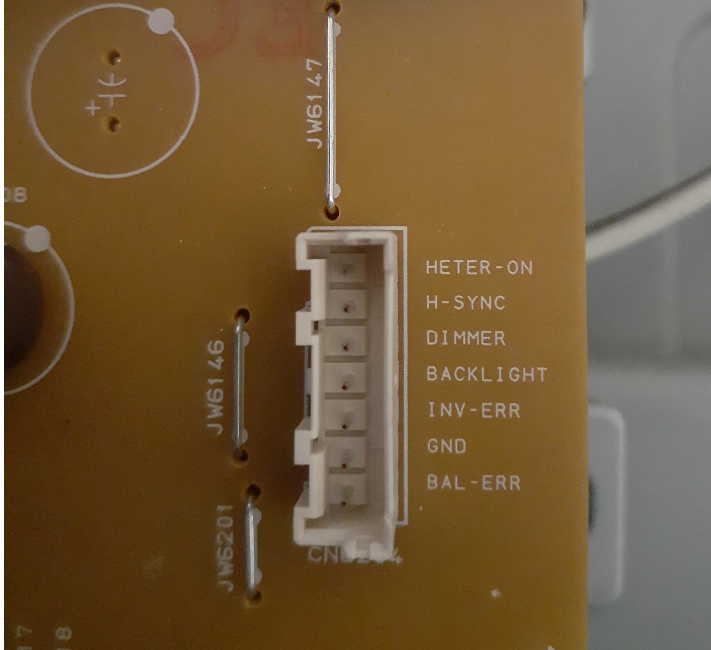
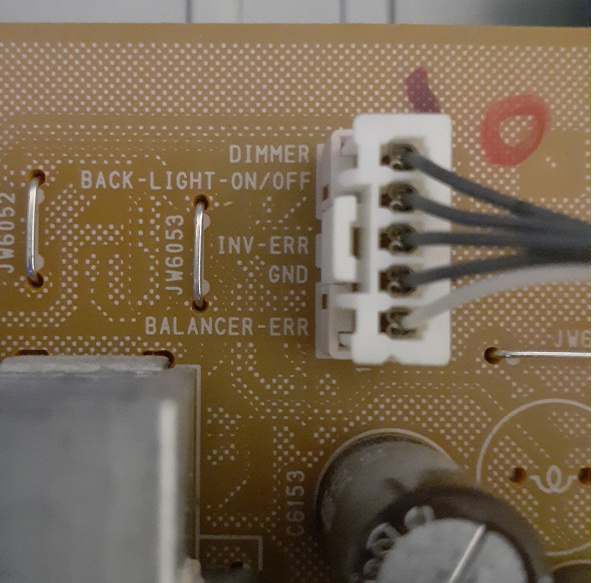
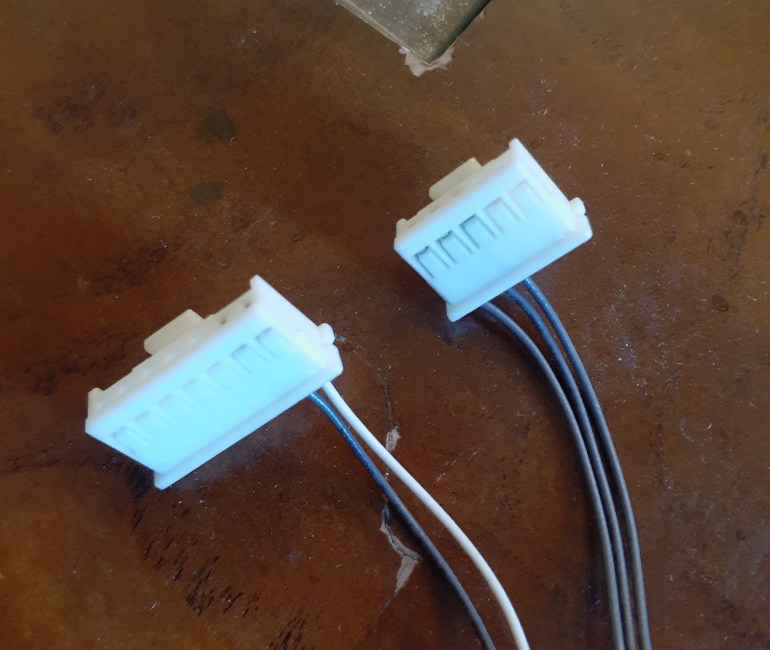
All of the cables lined up and connected without effort except one. I don't know the real name of the cable, so I will just call it the "control signal cable". The smaller TV only used 5 signals (in a 5 wire connector) whereas the larger TV used 7 signals (in a 7 wire connector). Again I consider myself lucky that I was moving from a large number of signals to a smaller number, so I wouldn't have to "invent" any signals (just had to throw two away). By carefully moving one wire at a time from the 5-wire connector to the 7-wire connector, my assistant and I were able to create a custom cable that reused the original connectors and carried the necessary signals to the control board.
It was time to test! After double-checking all the connections we powered up the TV - and nothing happened! Well, there was a click from the relay, which was some progress. At least we had confidence in the main power supply board this time. We poked at it again with the voltmeter and this time, we saw a 3.3V standby signal and 3.3V power_on signal! Seemed like very good news but why was the control board not turning on? I thought maybe the cable connecting the power supply to the control board may be bad. Luckily, it was identical to the original cable (same connectors) so it was easy to swap out. It turns out that it is actually not identical - the pins are in the opposite order! That gave a clear answer as to why the control board was not booting up. I only hoped that I had not accidentally fried something by connecting the wrong pins through the bad cable. I replaced the cable with the original one, and powered up again. After about 3 seconds, I saw the backlight switch on! I gently raised the TV off the floor, and saw a "No Input" message on the screen - success! Then it was just a few minutes to close, and we had a new working TV.